
How to get started with NextAuth ?
Create your own credentials provider in NextAuth


Authentication is a crucial aspect of any web application, ensuring that users can securely access their data and services. In Next.js applications, managing authentication can be complex, especially when dealing with security concerns and user sessions. While storing JWT tokens in local storage is a common approach, it comes with significant security risks. In this blog, we'll explore a more secure alternative using NextAuth.js, a powerful authentication library for Next.js applications.
Why Not Store JWT in Local Storage?
Storing JWT tokens in local storage might seem convenient, but it exposes your application to several security issues:
Cross-Site Scripting (XSS) Attacks: If an attacker injects malicious scripts into your web application, they can easily access tokens stored in local storage.
Persistent Storage: Tokens in local storage persist until explicitly removed, increasing the risk of unauthorized access.
Limited Security Features: Local storage lacks advanced security features like HttpOnly and Secure flags, which are available with cookies.
localStorage.setItem(token, "jwt123");
Instead of storing the JWT token in localStorage it could be stored in the cookies as it provides the in-built CSRF Protection and cookies are mostly controlled by server including flags, expiration times etc.
cookies().set('name', 'lee')
One of the primary challenges with cookies is the need to access and verify them with every incoming request on the server. This constant validation can burden server resources and complicate the authentication logic, especially in large-scale applications with numerous concurrent users.
To streamline authentication processes and overcome the complexities associated with traditional authentication methods, developers often turn to authentication libraries. One such powerful tool that simplifies authentication in Next.js applications is NextAuth JS.
Installing NextAuth.js
To get started with NextAuth.js, install the library using npm:
npm install next-auth
Next step is to create the below mentioned file structure.
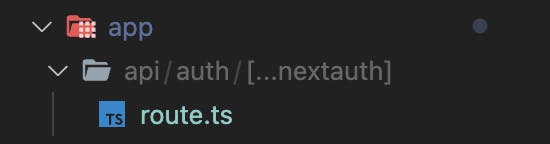
Now create your own authentication for email/password by pasting the below code in route.ts
import NextAuth from "next-auth";
import CredentialsProvider from "next-auth/providers/credentials";
import { AuthOptions } from "next-auth";

const authOptions: AuthOptions = {
  providers: [
    CredentialsProvider({
      name: "Credentials",
      credentials: {
        email: { label: "Email", type: "text", placeholder: "jsmith" },
        password: { label: "Password", type: "password" },
      },
      async authorize(credentials, req) {
        const email = credentials?.email;
        const password = credentials?.password;

        try {
          // database call
          return {
                id : user.id
            }
        } catch (e) {
          return null;
        }
      },
    }),
  ],
};

const handler = NextAuth(authOptions);

export const GET = handler;
export const POST = handler;
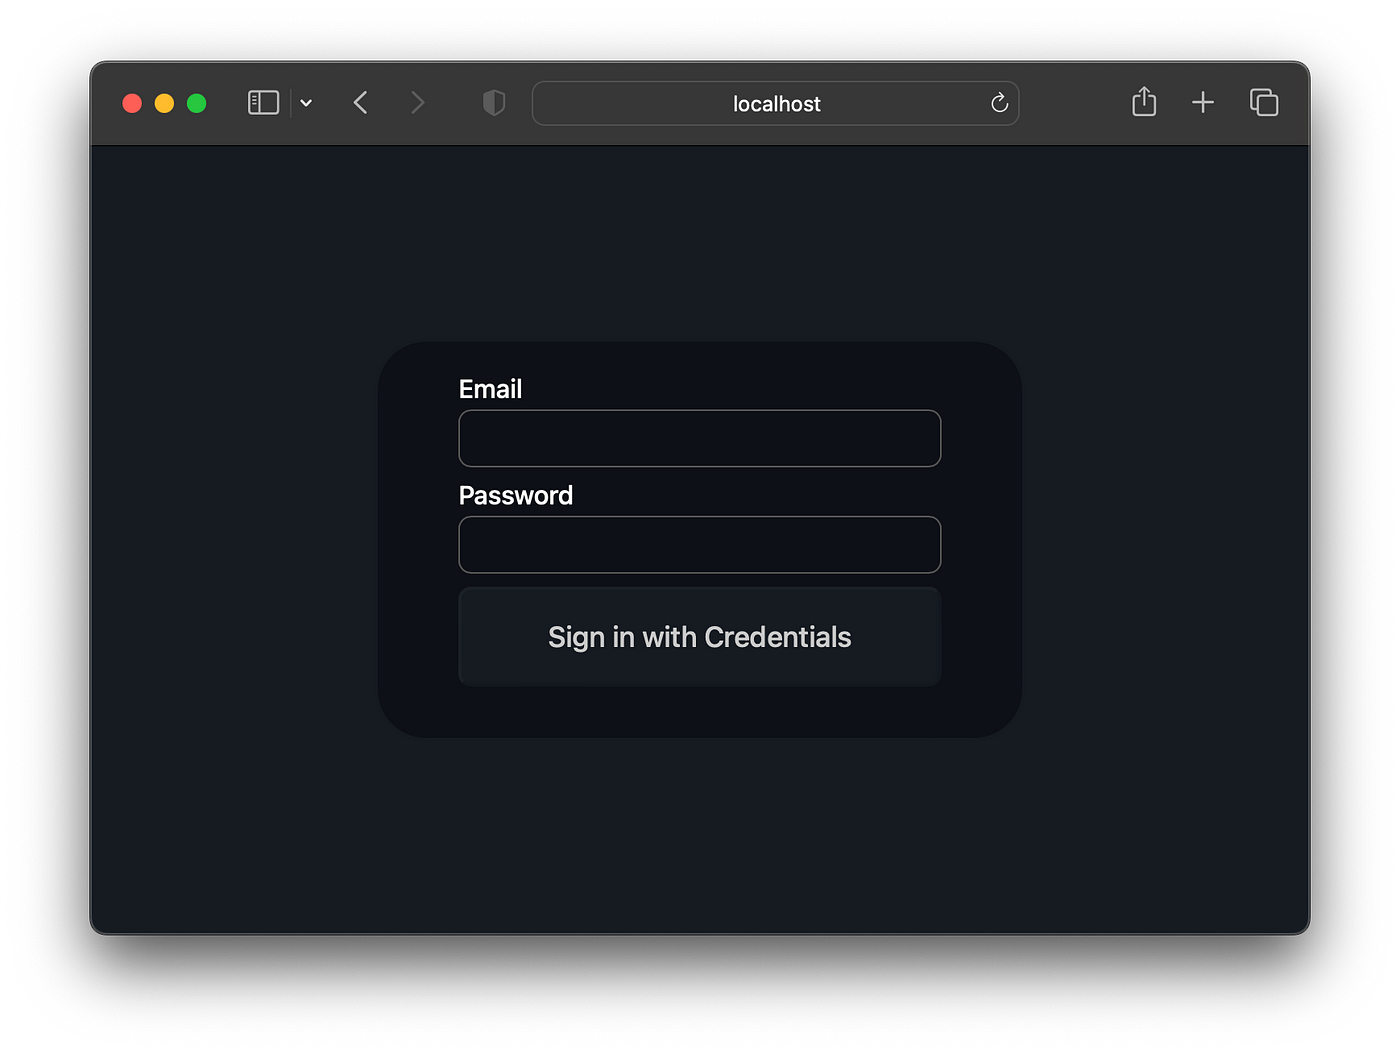
The above code would generate a login page at the api/auth/signin endpoint where user can login by entering their email and password.
When a user successfully authenticates through NextAuth.js, it generates a JWT containing authentication-related information. This JWT serves as a session token and is typically stored securely on the client side, often in a cookie.
Now Programmers need not worry about authentication. NextAuth library will take care of authentication like retrieving the cookie verifying its authenticity and returning the response.
Benefits of Using NextAuth.js
Security: By storing JWTs in cookies with appropriate security flags, NextAuth.js mitigates XSS and CSRF attacks.
Simplicity: NextAuth.js abstracts the complexities of authentication, allowing developers to focus on core application logic.
Flexibility: Supports multiple authentication methods, including OAuth providers like Google, Facebook, and GitHub, in addition to custom email/password authentication.
Scalability: Efficiently handles authentication for large-scale applications with numerous concurrent users.
Conclusion
Implementing secure authentication in Next.js applications is crucial for protecting user data and ensuring a seamless user experience. By leveraging NextAuth.js, developers can simplify authentication processes, enhance security, and focus on building robust applications. Whether you're starting a new project or upgrading an existing one, NextAuth.js provides a comprehensive solution for managing user authentication.